Step by Step: Tuning Your Thermostat for Savings
Your thermostat quietly controls one of the biggest slices of your energy bill, and most of us never really tune it. In this tutorial I walk through the exact steps I use…

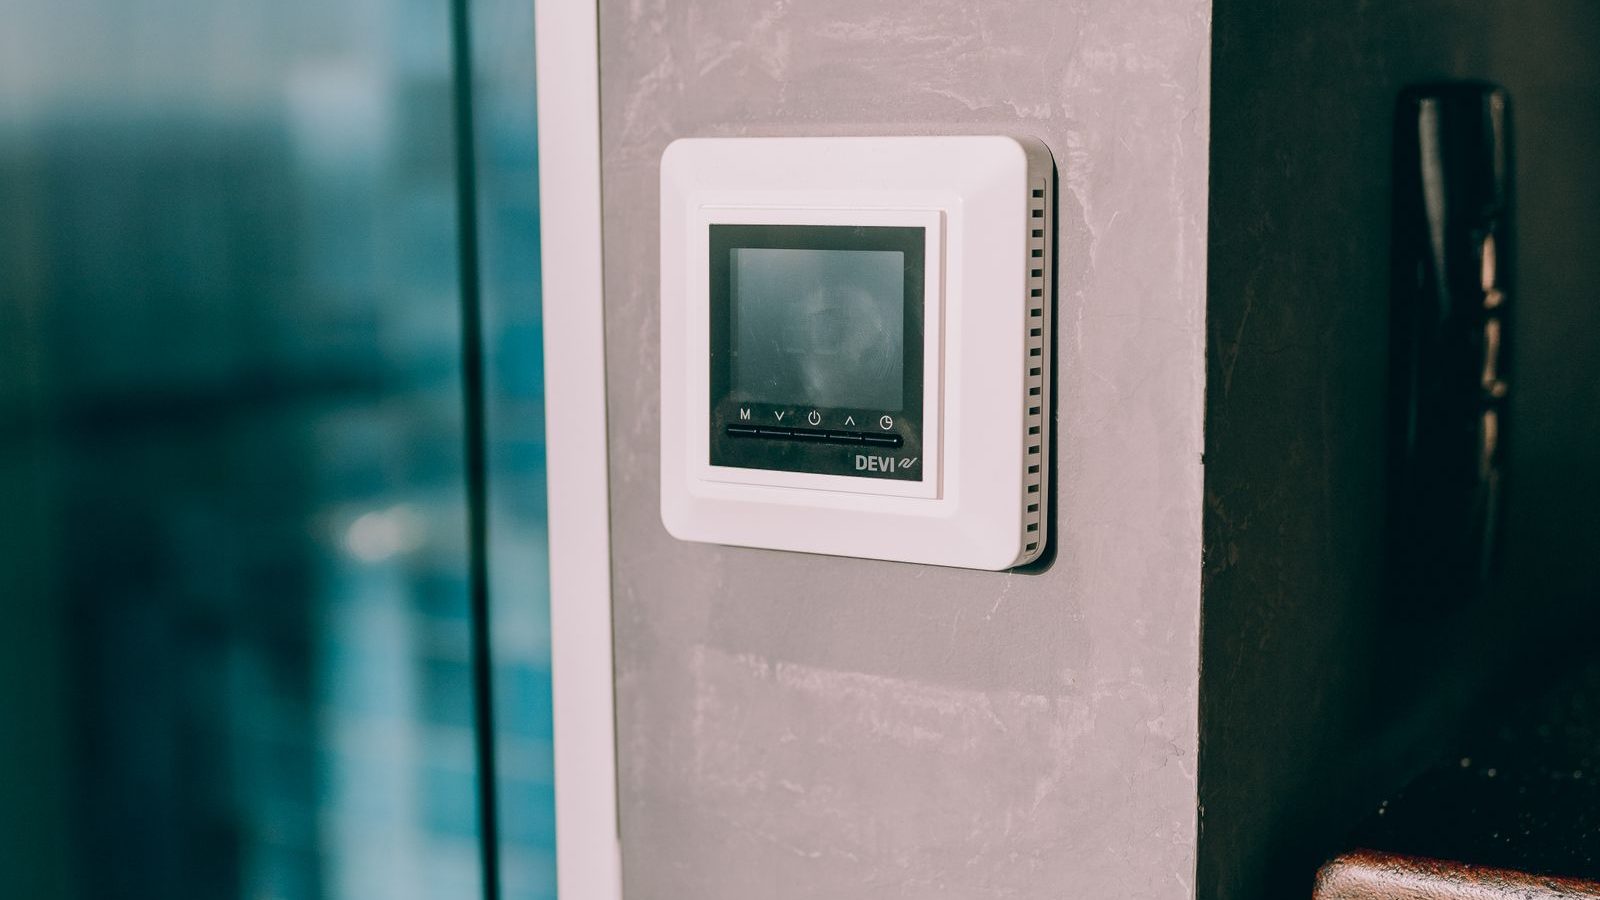
Your thermostat quietly controls one of the biggest slices of your energy bill, and most of us never really tune it. In this tutorial I walk through the exact steps I use with readers who want to cut heating and cooling costs without giving up comfort. It takes about ten minutes, and the savings show up on the next two bills.
I had a reader email me in February asking why her winter electricity bill kept climbing even though she had not changed anything in her routine. We hopped on a short call, and within five minutes I realized her thermostat was set to hold 72 degrees Fahrenheit around the clock, including the eight hours she was at work and the seven hours she was asleep under a thick comforter. She had never opened the scheduling menu. After we tuned it together, her March bill dropped by about 18 percent. Nothing about her comfort changed.
That story is the spirit of this guide. Tuning your thermostat is not about suffering through chilly mornings or sweaty afternoons. It is about matching the temperature to what your body actually needs at each part of the day, and letting the system rest when no one is home or awake to feel it. If you are also curious about whether your underlying heating system is the right fit, my beginner comparison of heat pumps and furnaces covers that bigger picture in plain language.
What you will need
You can complete this whole tutorial in about ten minutes, and the supply list is short. Most readers already have everything within arm’s reach.
- Your thermostat, either on the wall or accessible through an app on your phone. A digital programmable model gives you the most control, but even a basic dial thermostat benefits from the principles below.
- The manual or app guide for your specific model. If you cannot find the paper version, search the manufacturer name plus the model number printed on the side or back of the unit. Most manuals are free PDFs online.
- A pen and a small piece of paper, or a notes app. You will write down four numbers and four times. That is the entire log.
- Your last two energy bills, paper or digital. These give you the baseline you will compare against in step five.
- Optional: an indoor thermometer for a different room than the thermostat. Sometimes the room your thermostat lives in does not match how the rest of the house feels, and a second reading helps you catch that.
If your thermostat is more than ten years old and you find the buttons confusing, that is a sign it may be worth upgrading at some point. You do not need to today, but keep it in mind.
Step 1: Find your baseline setpoint (and the comfort range you’ll actually tolerate)
Before you change anything, write down what your thermostat is set to right now and how you actually feel in the room. This is your honest starting point, and it matters.
- Walk to the thermostat and read the current setpoint. Write it down. Note whether the system is set to heat, cool, or auto.
- Stand in the room for a minute. Are you comfortable in your current clothing? Slightly too warm? A bit chilly? Be honest with yourself rather than copying a number you saw online.
- Test the edges. Bump the setpoint two degrees in the less comfortable direction and wait fifteen minutes. If you are still fine, you have just found a cheaper baseline. If you feel uncomfortable, return to the original.
- Write down two numbers: your comfort floor (the lowest winter heat setting you tolerate) and your comfort ceiling (the highest summer cooling setting you tolerate). For most households these land around 68 degrees Fahrenheit in winter and 76 degrees Fahrenheit in summer, but yours may differ.
- If you live with other people, ask them to do the same test. The household setpoint is the compromise that respects everyone, not just the person who controls the app.
This step alone often saves money. A lot of homes are heated or cooled to a number someone chose years ago and never revisited. Two degrees of room temperature can mean about six to ten percent less energy use, which is real.
Step 2: Set a schedule (wake, away, evening, sleep)
Most programmable thermostats organize the day into four blocks. Once you fill those in honestly, the system does the work without you thinking about it.
- Wake: this is when you want the house comfortable as you get out of bed. Set the start time about thirty minutes before your alarm so the system has time to warm or cool the rooms. Use your comfort floor in winter or comfort ceiling in summer.
- Away: this is the long stretch when nobody is home. School and work hours for many households. This is where the deepest setback lives, and we will set the exact numbers in step three.
- Evening: when people are back home, cooking, watching shows, or playing with kids. Comfortable again, similar to the wake block.
- Sleep: bodies tolerate cooler rooms while asleep, and a slightly cooler bedroom is actually linked to better sleep quality. This is the second setback block of the day.
Open the schedule menu on your thermostat or in the app, and enter the four start times and four target temperatures. Save. If your model offers a different schedule for weekends, fill those in too. Many of my readers find that weekend schedules look more like the evening block all day, since people are home.
Step 3: Use setbacks (8 degrees Fahrenheit summer, 7 degrees Fahrenheit winter)
A setback is simply the difference between your comfort number and the temperature the system is allowed to drift to during away and sleep blocks. The Department of Energy estimates around one percent savings for every degree of setback maintained for eight hours, which adds up quickly.
- For summer cooling, set your away and sleep blocks 8 degrees Fahrenheit warmer than your comfort ceiling. If your ceiling is 76, your away setting becomes 84.
- For winter heating, set your away and sleep blocks 7 degrees Fahrenheit cooler than your comfort floor. If your floor is 68, your away setting becomes 61.
- If you have a heat pump, override these numbers and use a smaller setback as the callout above explains.
- For homes with pets, check the away setting against what is safe for your animals. Dogs and cats handle most setbacks well, but reptiles, birds, and some small pets need narrower ranges. Ask your vet if you are unsure.
- Save the schedule and let it run for two full weeks before judging it. Bodies need time to adjust, and so does the house.
- Winter comfort floor 68 degrees Fahrenheit with a 7 degree setback to 61 when away or asleep
- Summer comfort ceiling 76 degrees Fahrenheit with an 8 degree setback to 84 when away or asleep
- Heat pump homes use a smaller two to three degree setback to avoid backup heat
- Schedule includes four blocks: wake, away, evening, sleep, with weekend overrides if needed
Step 4: Use smart features without overcomplicating
If your thermostat is a smart model, it likely offers a stack of features beyond basic scheduling. Use the ones that help, ignore the ones that add friction, and never feel obligated to enable every setting.
- Geofencing: this lets the thermostat detect when your phone leaves a certain radius around your home and switch to the away setting automatically. It is one of the best smart features because it handles the days your schedule shifts. Turn it on if your model supports it.
- Learning mode: some thermostats observe your manual adjustments for a week or two and build a schedule from your behavior. If you trust the brand, try this. If the suggestions feel off, switch back to manual scheduling.
- Remote sensors: small wireless pucks you place in other rooms, often a bedroom or living room far from the thermostat. The system can prioritize that room during specific blocks. Useful if your thermostat sits in a hallway that runs warmer or cooler than where you actually spend time.
- Energy reports: weekly or monthly summaries showing how many hours the system ran. Read these once a month and notice trends. If runtime jumps without a weather change, something is off.
- Skip features you will not use. Voice control, fancy integrations, and overly clever automations sometimes create more confusion than savings. Pick two or three features and master those. For ideas on small device level wins, my piece on smart plugs explained for everyday homes covers a complementary low effort upgrade.
The point of smart features is to remove friction, not add new buttons to press. If a feature makes you fiddle more than the old setup, turn it off.
Step 5: Recheck the bill in two months
This is where most tutorials stop, but it is also where the real proof lives. Two months gives the system time to settle and your bill cycle time to reflect the changes.
- Pull out the bill from the month before you tuned the thermostat. Note the kilowatt hours used and the dollar amount.
- Compare it against the bill that arrives roughly sixty days after you saved your schedule.
- Adjust for weather. A much colder or hotter month than the previous year will skew the comparison. Most utility bills now include a small chart showing average outdoor temperature, and you can use that to roughly normalize.
- If you saved energy and you are still comfortable, you are done. Nothing more to do until the season changes, when you will swap winter setbacks for summer setbacks.
- If you did not see savings, check three things first: did the schedule actually run, did anyone manually override it often, and is your home well insulated? A poorly sealed home can quietly leak the savings right out the windows. For more low effort wins beyond the thermostat, my list of ten low effort habits that cut your electricity bill pairs nicely with this tutorial.
Tuning a thermostat is one of those small, calm projects that delivers more than its size suggests. Ten minutes of attention, two months of waiting, and you have shaved a meaningful chunk off a recurring bill for years to come. Once you have done it once, you will repeat the process every spring and autumn almost automatically, swapping cooling settings for heating settings as the seasons turn. That rhythm is what quietly separates a home that wastes energy from a home that respects it.
Frequently asked questions
How much can I really save by adjusting my thermostat schedule?
Most households see between 8 and 15 percent off their heating and cooling portion of the bill after setting honest setbacks during away and sleep blocks. Exact savings depend on your climate, insulation quality, and how much your old setpoint differed from a comfortable but realistic target. Two degrees of room temperature roughly translates to six to ten percent less energy use, so the math adds up quickly across a full season.
Is it cheaper to keep the thermostat at a steady temperature all day?
For most central heating and air conditioning systems, no. Setbacks during periods when nobody is home or awake save energy because the system runs less overall. The old myth says that warming or cooling a house from scratch costs more than holding steady, but careful studies have shown the opposite for traditional furnaces and air conditioners. Heat pumps are the one exception, where smaller setbacks of two to three degrees work better than deep ones.
What temperature should I set my thermostat to in winter?
A common recommendation is 68 degrees Fahrenheit while you are awake and home, dropping to about 61 degrees when away or sleeping. Adjust based on your own comfort, your clothing habits, and any household members who need warmer rooms. The goal is not to copy a specific number but to find your honest comfort floor and use setbacks during hours when a slightly cooler house simply does not matter to anyone.
Do I need a smart thermostat to follow this tutorial?
Not at all. Any programmable digital thermostat lets you set four daily blocks, which is the heart of this guide. Smart thermostats add conveniences like geofencing, remote sensors, and energy reports, and those help, but a basic programmable model can deliver almost the same savings if you take ten minutes to enter a proper schedule and stick with it for two months before judging the results.
My thermostat is in a drafty hallway and the rest of the house feels different. What should I do?
This is a common issue. The thermostat reads only its own location, so a hallway near a front door can run colder than your living spaces and trick the system into overheating. Options include moving the thermostat during a future upgrade, adding a remote room sensor if your model supports one, or simply offsetting your setpoint by a degree or two until the rest of the house feels right. A second indoor thermometer in your main living area helps you calibrate.
How long should I wait before deciding the new schedule is not working?
Give it two full weeks of normal living before judging comfort, and two billing cycles before judging savings. Bodies adapt to slightly cooler or warmer rooms within a few days, and the system needs time to settle into the new rhythm. If after two weeks you still feel uncomfortable, narrow the setbacks by a degree or two rather than abandoning the schedule entirely. Small adjustments beat starting over from scratch.
Read next in Home Energy Savings
If this guide was useful, these two neighbouring pieces will fill in the surrounding context:
Sources and further reading
For the underlying data behind the numbers in this guide, and for the standards, incentive programs, and safety rules referenced throughout, see:
Related guides

Five Energy-Saving Myths That Are Quietly Costing You Money
Most of the energy tips floating around the internet are either decades out of date or were never true to begin with. They feel right because someone confident said them once, and…
Attic and Crawlspace Insulation Payback by Climate Zone
Last February I crawled into a 1926 attic in Southeast Portland with a flashlight and a tape measure and found about four inches of shredded newspaper insulation, matted flat, with visible joist…
Scenario: Cutting Bills in a Rental Apartment
Renters often feel stuck. You cannot change the windows, the appliances, or the insulation, so the usual advice about home energy savings reads like it was written for someone else. This article…